Sign Up
Already have an account? Sign in here
Sign In
Dont have an account? Sign up here
Invisible Join
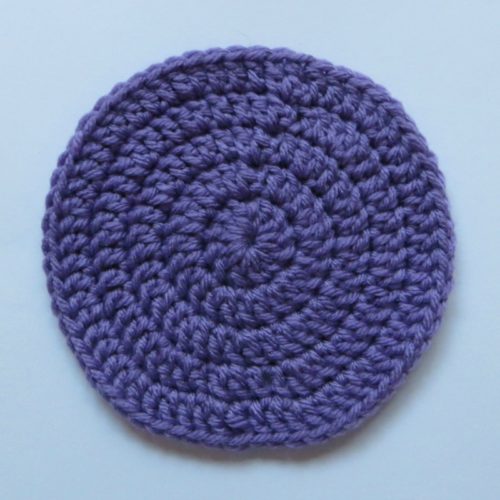
Like so many techniques used in crochet, there is a plethora of tutorials out there for you to learn from.
There is no right or wrong way, there is simply the way that works for you.
I have tried a few different methods for making an invisible join, and this is the way that works best for me. I hope you find it helpful.
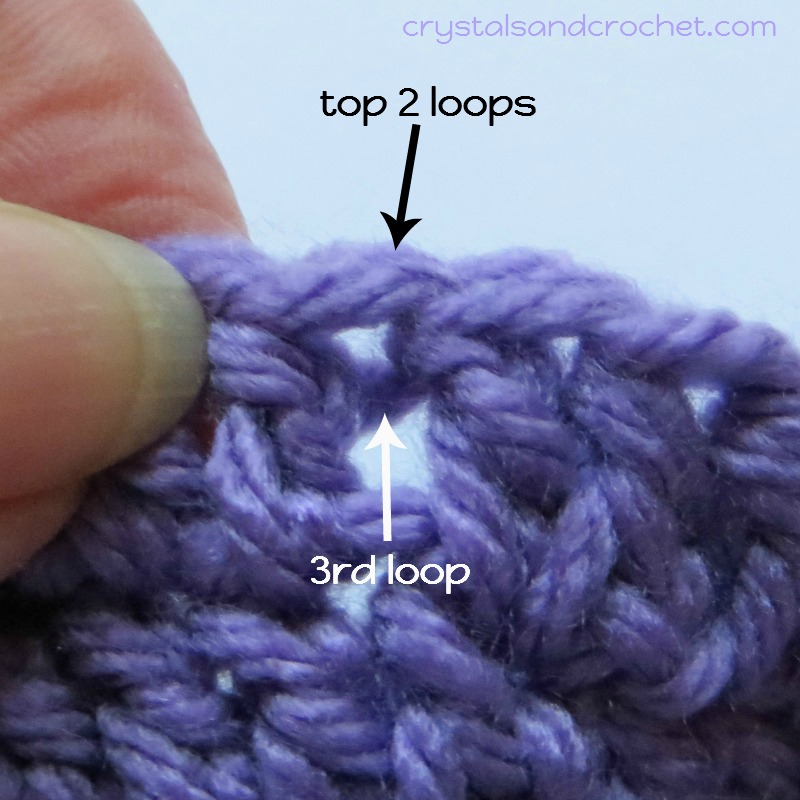
Firstly let me remind you of what the top of a stitch looks like.
You can see there are two loops that sit flat on the top of your work.
But when you stretch the stitches apart slightly you can see there is another [3rd] loop that crosses diagonally at the back of the stitch.
Why is this important?
Because many of the methods out there I tried do not account for this, which can make it a bit tricky when working the following round.
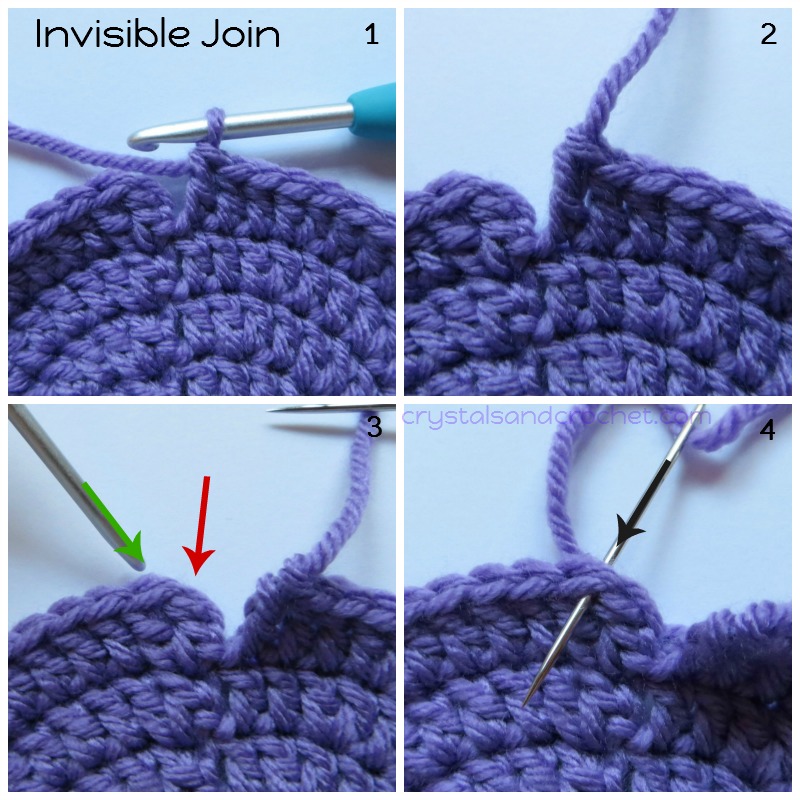
Once your last stitch is completed [photo 1], cut your yarn, leaving at least a 6 inch tail.
Depending on the type of yarn you are using you may need up to 10 inches to work comfortably with.
Pull the end right through [photo 2]
Thread your tail end through your yarn needle.
The red arrow in photo 3 shows your starting stitch, or chain start, with an invisible join you are going to make a “false” top to this stitch and cover it with the invisible join.
The green arrow is pointing to the 2nd stitch, this is the stitch you will join to.
Insert your yarn needle, from back to front, under the top loops of stitch 2. [photo 4]
Pull your stitches together, not too tightly.
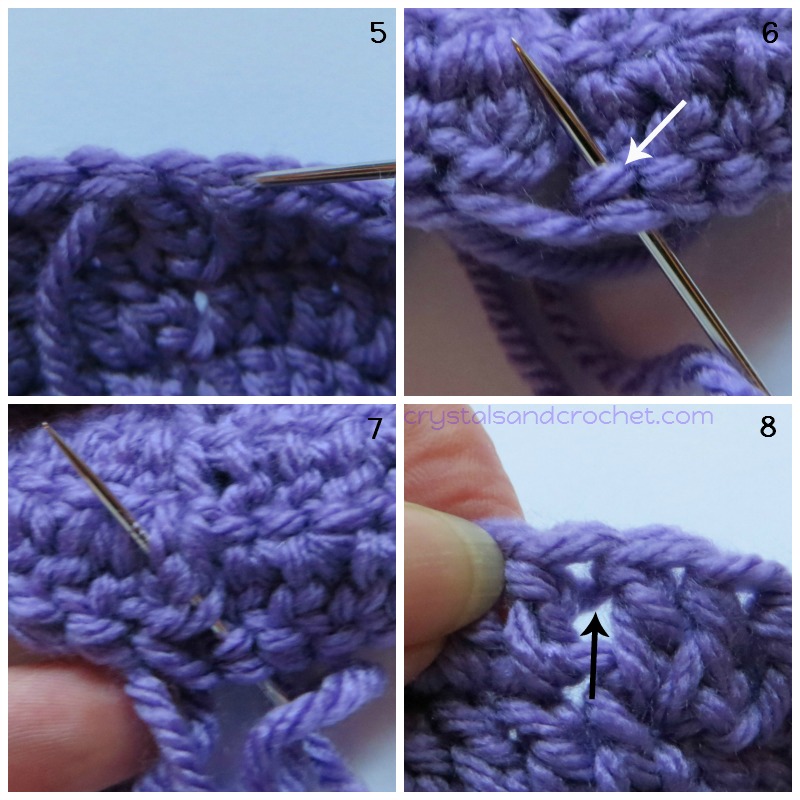
You will see that you have already formed the back loop of your invisible stitch. [photo 5]
Tilt your work so that you can see the 3rd loop of the last stitch [photo 6] the white arrow is pointing to the 3rd loop.
Make sure your needle is through both the back loop and the 3rd loop of the last stitch.
Now push your needle diagonally down through the back of the starting stitch [photo 7]. Gently pull your tail end through, not too tightly as you want the loops to be the same size as all your other stitches.
And you have now created a perfect invisible join, with a 3rd loop [photo 8].
I also find with this technique the join will hold securely while working the next round, and not stretch apart, leaving a gap.

I hope you find this helpful.
Please let me know if there are any other tutorials you would like me to cover, and I will gladly help.
♥ If you need help and advice, the quickest way to find support is to join Helen’s Hookaholics Facebook group. There you will find a very supportive group of likeminded people. It’s also a great place to share your crystalsandcrochet makes, and see what others are making, and see what I am up to.
♥ If you are not a fan of Facebook you can always email me with any questions you may have by using the contact form here.


