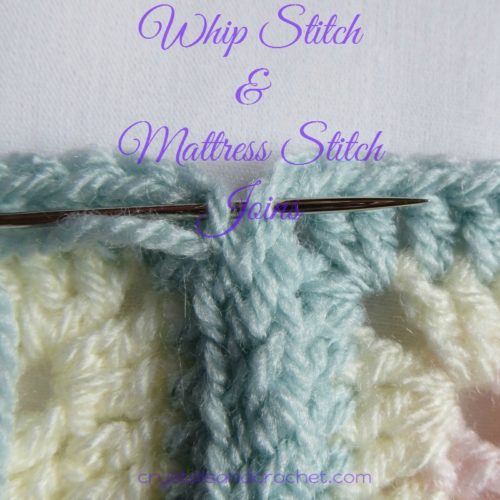
A very easy way to join your squares together is to sew them, using a blunt yarn needle and either matching yarn, or for something more creative, use a contrasting yarn.
This tutorial covers the two basic methods of sewing squares together, Whip Stitch and Mattress Stitch.
One of the things that can really spoil the look of a beautifully made afghan or throw is not joining over the corners properly. I have covered the corners in depth, to help you get beautiful results every time.
♥ When sewing your squares, DO NOT pull the yarn too tightly, this will give a slightly gathered effect and will spoil the look of your finished piece.
♥ Again there is no right or wrong way, but there is a right and wrong side.
♥ All you need to do is choose which side you want to work from, which will determine your finished look.
For all other aspects of joining squares, please check out my main post on Joining Squares.
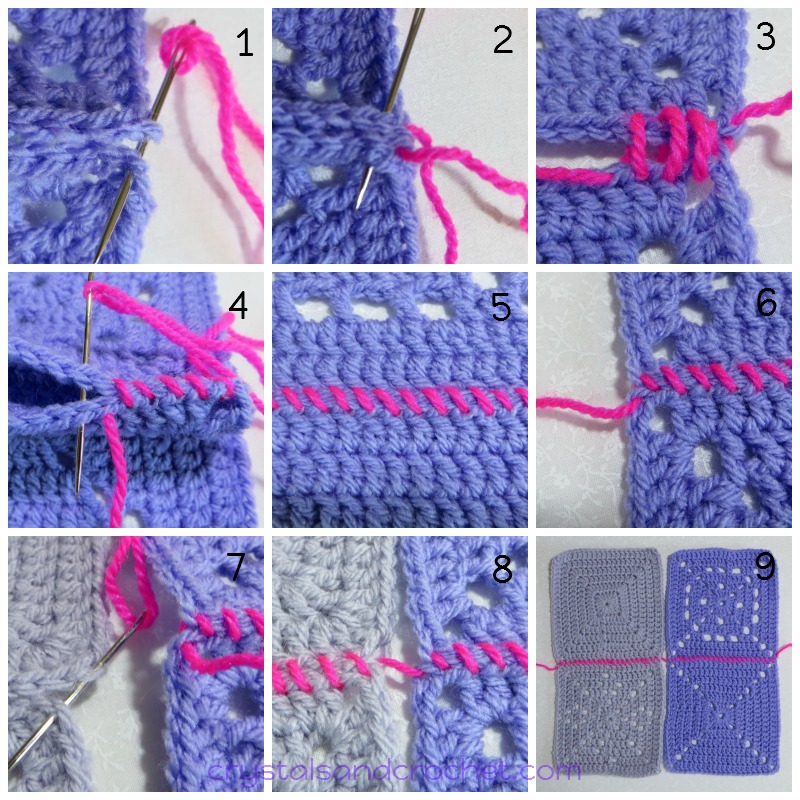
Whip Stitch Join
You can choose to work with either right or wrong side facing you, all you need to do is choose the effect you want.
Do you want to see the stitch loops on top of your work, or do you want as little visible as possible?
This photo tutorial shows, wrong sides together, right side facing.
Whip stitch is worked through both loops of all stitches, and just 1 loop of any chain spaces, and is worked from back [furthest from you] to front [closest to you]
Photo 1
Begin in the corner st or ch space furthest from you, and work through corner st or ch space on 2nd square.
Photo 2
Put needle through next 2 sets of loops/sts.
Photo 3 and 4
This shows the roll effect that is created as you continue to work from back to front with each stitch.
Photo 5
Continue working along both squares.
Photo 6
Make sure you work right to the final st/ch space in the corner.
Photo 7 and 8
Continue on to next pair of squares, working in exactly the same way.
Photo 9
4 squares joined, continue to join all the squares in your first strip.
Once you have joined all your strips in one direction, you will need to very carefully turn your work.
Photo 10
As you come to a previous join, make sure you complete the last stitch for this pair of squares, right in the corner [there will already be a stitch there].
Photo 11
Continue into the corners of the next pair of squares, this will form a cross, and secure all 4 squares together.
♥ Continue until all your squares are joined, work away all tail ends, and you are ready to add a border.
Remember using the same colour yarn as your square will give you a barely visible, but very strong join.
Using a contrasting colour can add a fun factor, especially to childrens blankets or toys.
Video Tutorial.
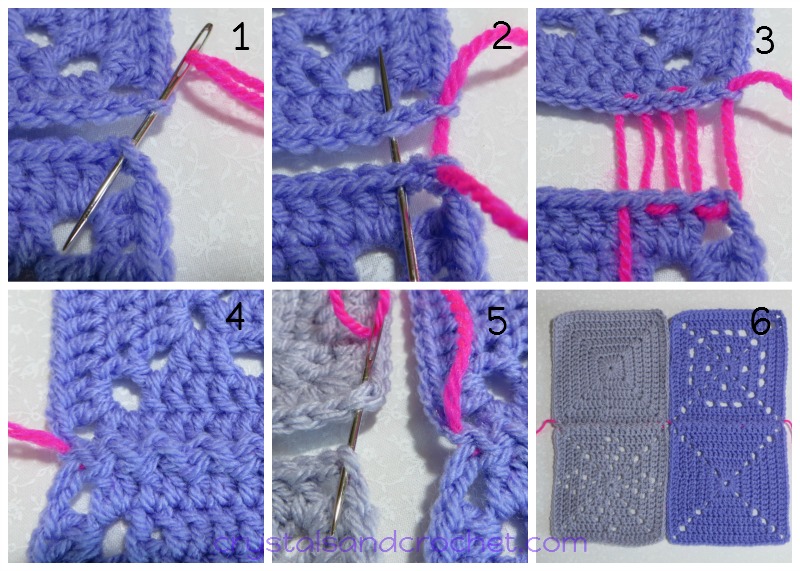
Mattress Stitch Join
Again you have lots of choices.
♥ You can work through both loops of your stitches, or just the inner or outer loops.
♥ This technique will give you a practically invisible join.
Mattress stitch is worked from back to front, then front to back.
Photo 1
Begin in the corner st or ch space furthest from you, and work through corner st or ch space on 2nd square.
Photo 2 and 3
Move along 1 stitch and put your needle through from front to back, continue to work back and forth, moving along one stitch at a time.
Photo 4
Continue to the end of your squares, ensuring your last stitch is in the corner st/ch space.
You can also see the joining yarn does not show at all.
Photo 5
Move into next pair of squares continuing in which ever direction comes next [this depends on stitch count].
Photo 6
4 squares joined, continue to join all the squares in your first strip.
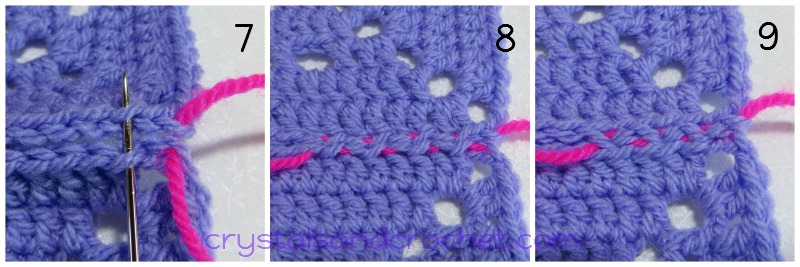
Photo 7 and 8
Working with wrong sides together and in outer loops only.
Photo 9
Working with wrong sides together and in inner loops only.
This will give a slight ridge along the join.
As you can see with these two techniques the yarn used to join shows slightly.
Once you have joined all your strips in one direction, you will need to very carefully turn your work.
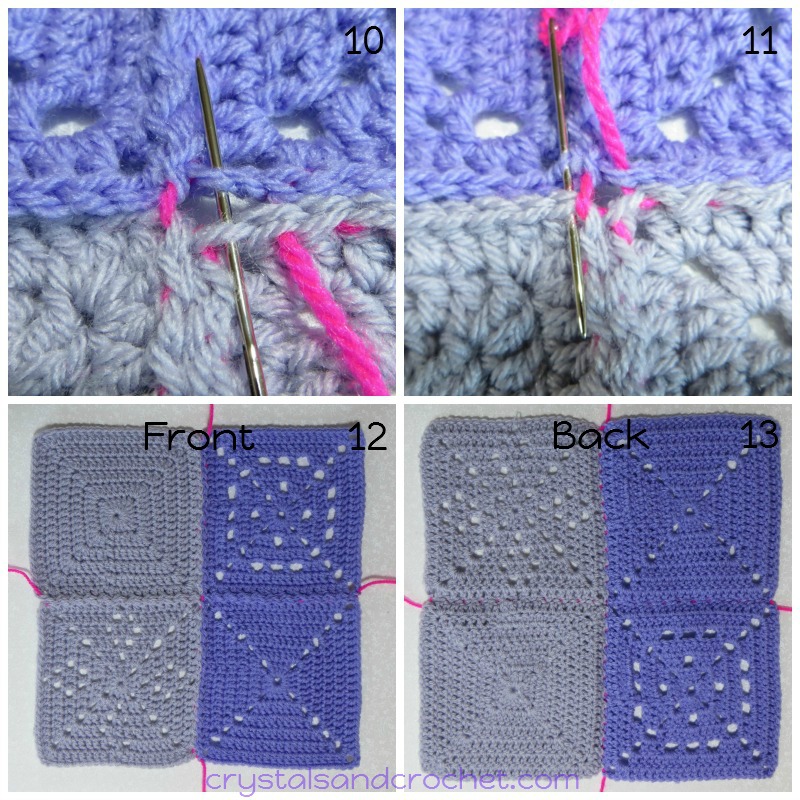
Photo 10
As you come to a previous join, make sure you complete the last stitch for this pair of squares, right in the corner [there will already be a stitch there].
Photo 11
Continue into the corners of the next pair of squares, and secure all 4 squares together.
Photo 12 and 13
Shows front and back, of all squares joined together.
♥ Continue until all your squares are joined, work away all tail ends, and you are ready to add a border.
Video Tutorial.
♥All of my tutorials are free and are written or recorded using US terminology.
♥If you need help and advice, the quickest way to find support is to join Helen’s Hookaholics Facebook group. There you will find a very supportive group of likeminded people. It’s also a great place to share your crystalsandcrochet makes, and see what others are making, and see what I am up to.
♥If you are not a fan of Facebook you can always email me with any questions you may have by using the contact form here.
Adsense
Partners
My Recommended Suppliers
Privacy Overview
This website uses cookies so that we can provide you with the best user experience possible. Cookie information is stored in your browser and performs functions such as recognising you when you return to our website and helping our team to understand which sections of the website you find most interesting and useful.
Strictly Necessary Cookie should be enabled at all times so that we can save your preferences for cookie settings.
If you disable this cookie, we will not be able to save your preferences. This means that every time you visit this website you will need to enable or disable cookies again.