How to attach a crochet piece to a hoop.
A unique piece of artwork can be a great asset to your home, and extremely satisfying to make.
From tiny pieces, made with very fine thread, to huge pieces hung with a hula-hoop, this is an opportunity to create something totally unique, in what ever design, colour, stitch pattern you like.
Many people make doilies, or have some that have been handed down from Mothers, or Grandmothers. What more beautiful way to honour their skills, than to make a piece of artwork out of it.
In this blog post I just want to share with you all, how I attach a round piece of crochet to a hoop, or ring to make a wall hanging.
Mandalas are very popular, so are dream catchers, but lets just have a quick look at what they are, and why I call these wall hangings.
Mandala
The easiest way to understand a Mandala is to think of it as a symbolic representation of the universe, often sacred, based on a circle.
The word “Mandala” is from the ancient Sanskrit language. Loosely translated to mean “circle,” a Mandala is far more than a simple shape. It represents wholeness, and appears in all aspects of life: the celestial circles we call earth, sun, and moon, as well as conceptual circles of friends, family, and community.
Dream Catcher
Dream Catchers were originally created by the Native American peoples, they were or are made from all natural materials, a circle, normally of wood, like willow, with a web of sinew woven across the circle, just like a spider’s web. Then adorned with feathers, beads, shells, which would all have a spiritual meaning.
When hung above the bed in a place where the morning sunlight can hit it, the dream catcher attracts and catches all sorts of dreams and thoughts into its webs. Good dreams pass through and gently slide down the feathers to comfort the sleeper below. Bad dreams, however, are caught up in its protective net and destroyed, burned up in the light of day.
Wall Hanging
A wall hanging is literally anything hung on a wall. It can be any shape or size, framed or not, it can also be made form any form of material, from natural fibres to plastics, stones, beads, absolutely anything.
So, maybe, just have a little think about what you are making and why, but know that it will be beautiful, and something to be proud of.

What type of hoop will you need?
♥ You can use any kind of hoop, just think about the size you want, and the weight of it.
♥ You can easily purchase wooden or metal rings, which are fairly, thin and anything from 3 to 40 inches across.
♥ Embroidery hoops and quilting hoops are also readily available and come in a good range of sizes.
♥ When you want to go large, a hula-hoop can be a fabulous statement piece, or you can even go to the local hardware store and buy thin flexible pipe to make your hoop whatever size you want.
♥ Thin metal or wooden rings are very easy to crochet around.
To attach your crochet piece all you need do is make one extra round, working around the hoop.
In this example I have made a single crochet [sc US terms, dc UK terms] in each stitch, working over the hoop.
Once you have finished your final round, and joined with a slip-stitch, place your piece inside the hoop.
1. Make sure your yarn is UNDER the hoop.
2-3. Working over the hoop, chain 1, then sc in same stitch.
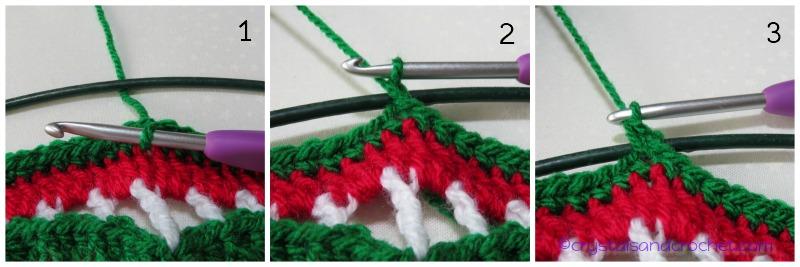
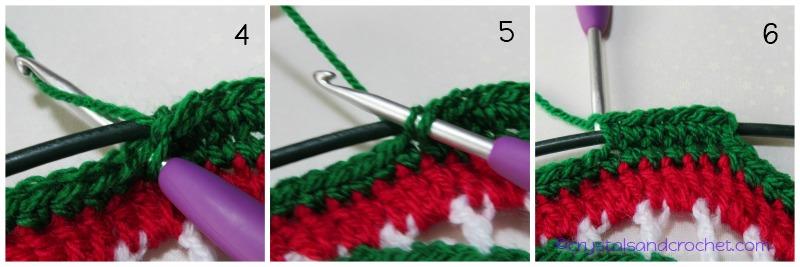
4-5. To work over the hoop, place hook through next stitch and under the hoop, yarn over, and pull up a loop, with your hook on top of the hoop, yarn over and pull through both loops, exactly the same as making a normal sc. Continue to work all the way around, making a sc in each stitch.
6. Keep your tension firm and even, loose tension will result in a saggy finish and may cause your wall hanging to droop.
Going Large.
When it comes to making a real statement piece, and using a large hoop, it is much trickier to crochet around it. Sewing with yarn and a needle is much easier.
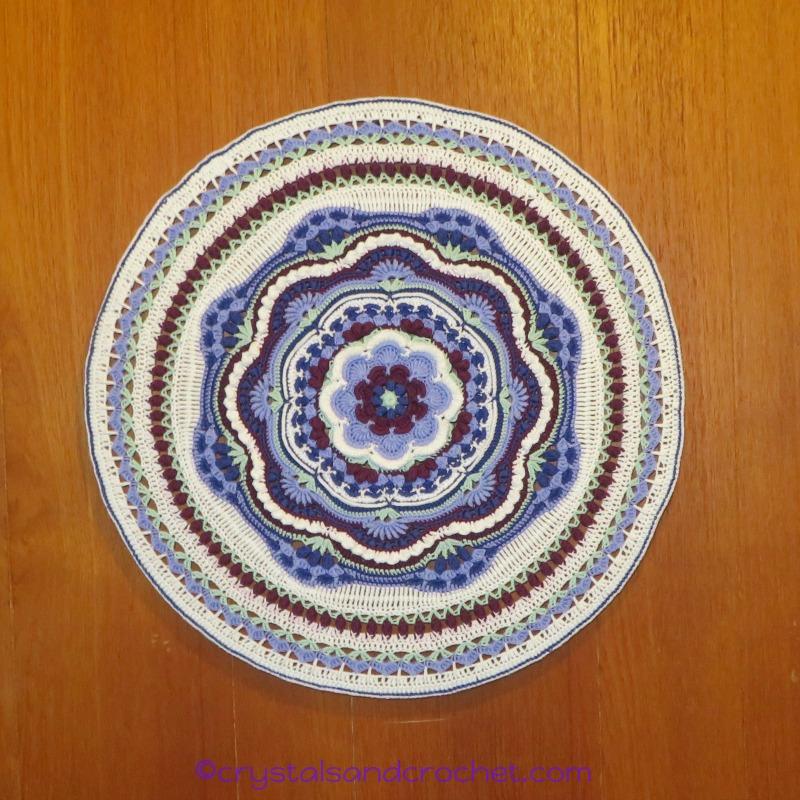
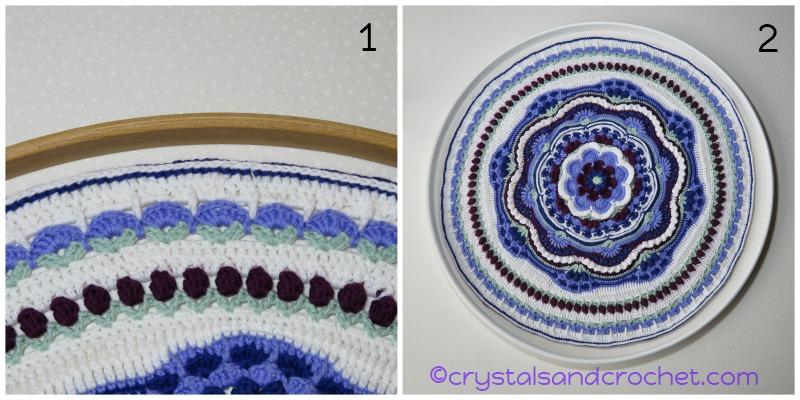
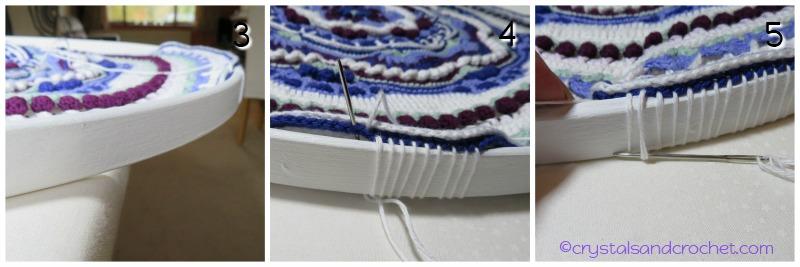
My example is the centre, round, part of the Rosslyn pattern.
I made this as I was travelling around Australia, and knew I wanted to frame it in some way. I wanted the frame to have some depth to it, and I found the perfect size quilting hoop [50cm across, and 2cm deep].
I then painted the hoop as I wanted it white, I used normal acrylic paint.
1. When stitching to a frame, it is easier to work with the frame on a table, and slightly hanging over the edge. I prefer to work with right side up, so that my piece sits on top of the frame, which means, when hung, it will sit away from the wall.
2. Start by cutting a length of yarn, thread on to needle, and work the end away through the back of the last round, make sure it is really secure, as you will be putting a fair bit of tension on it.
3. Work into each stitch, and around the hoop, working up, from underneath the hoop and through the next stitch.
4. Continue around maintaining a firm even tension.
5. I find it easiest to work a few stitches, and then holding the end, hook the needle under the stitch and pull , working back towards the free end, this will keep everything nice and tight.
♥ My new piece of artwork, in it’s temporary place, as this will be for my new bedroom, when I move.
I love the simplicity of this way of framing/hanging my unique piece of artwork.

♥ Your creativity is the only limit to the amazing works of art you can use to decorate your home, or garden.
These can be used to decorate your garden for a special party, or just to have hanging in trees, to give you a unique display of your skills.
Though both of my examples have solid edges, if you have a piece with points or picots, you can also crochet, or stitch around a hoop. Simply mark your hoop or pin piece to hoop and starting at any point, work your way around, either making single crochet stitches around the hoop, between the points, or wrap the yarn around between stitches.
I will be making more of these and will add more photos as I complete them.
I hope you have found this helpful, and I look forward to seeing your unique pieces of artwork.
♥ If you need help and advice, the quickest way to find support is to join Helen’s Hookaholics Facebook group. There you will find a very supportive group of likeminded people. It’s also a great place to share your crystalsandcrochet makes, and see what others are making, and see what I am up to.
♥ If you are not a fan of Facebook you can always email me with any questions you may have by using the contact form here.