Creative Cushions

We all love to make our homes look attractive and crochet cushions are a wonderful way to add a unique splash of colour and creativity to any room.

Here is a quick list of all of my cushion patterns.
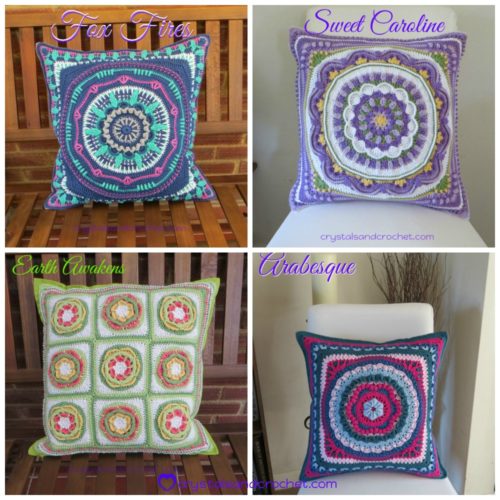
A Walk in the Garden
Arabesque
Elements Collection
Fox Fires
Moon’s Shadow
Sweet Caroline
Sanctuary
Squircle

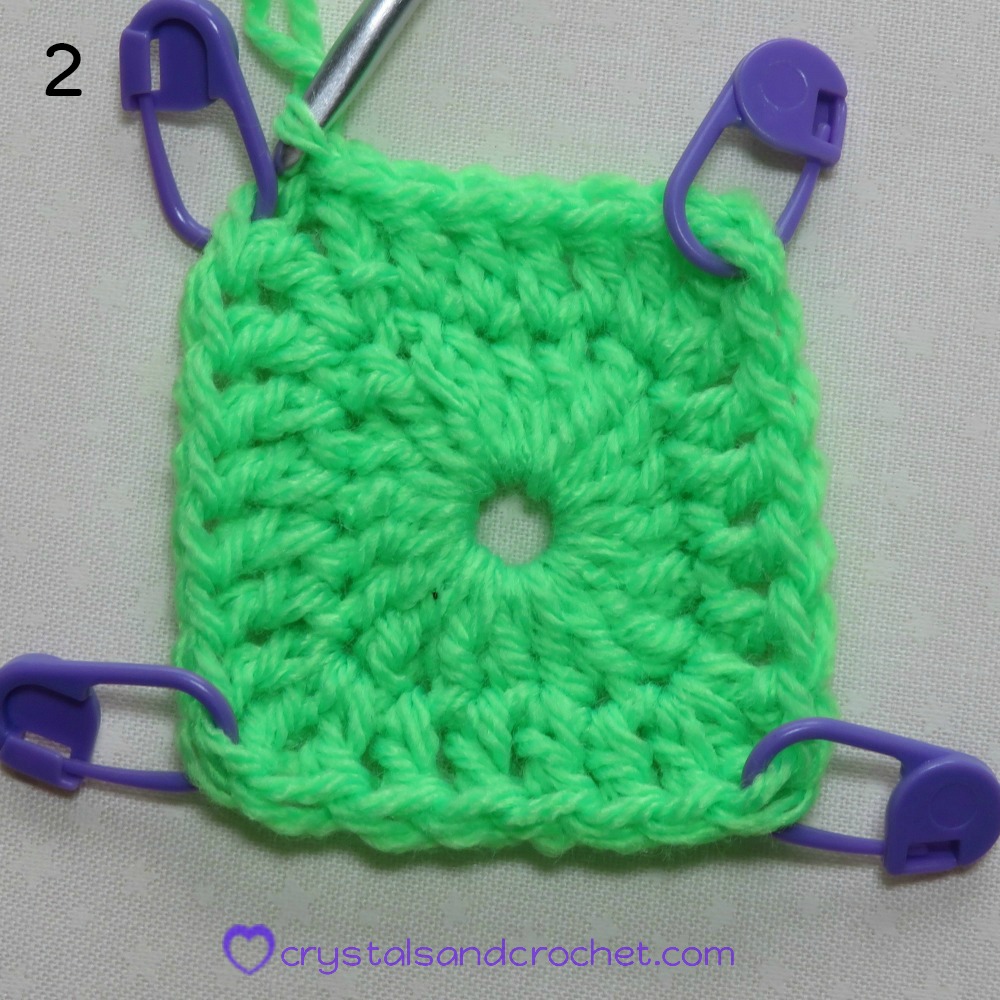
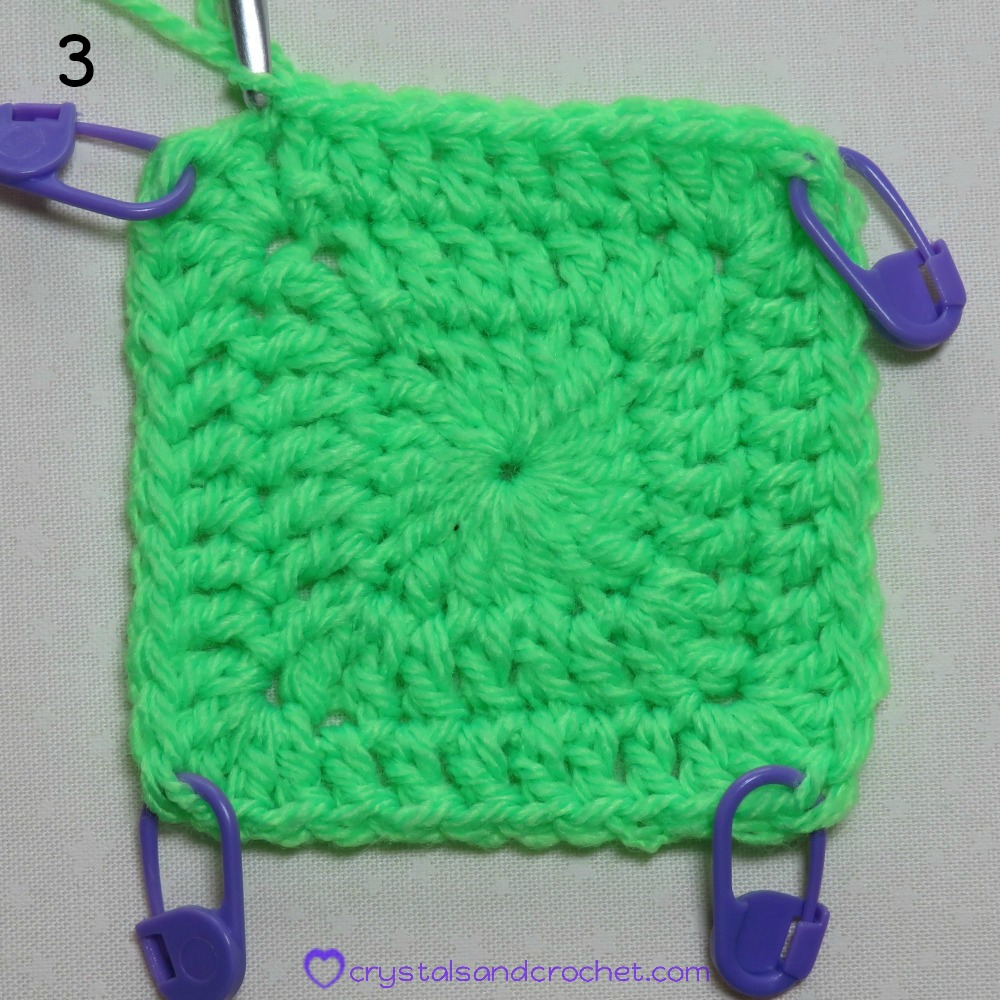
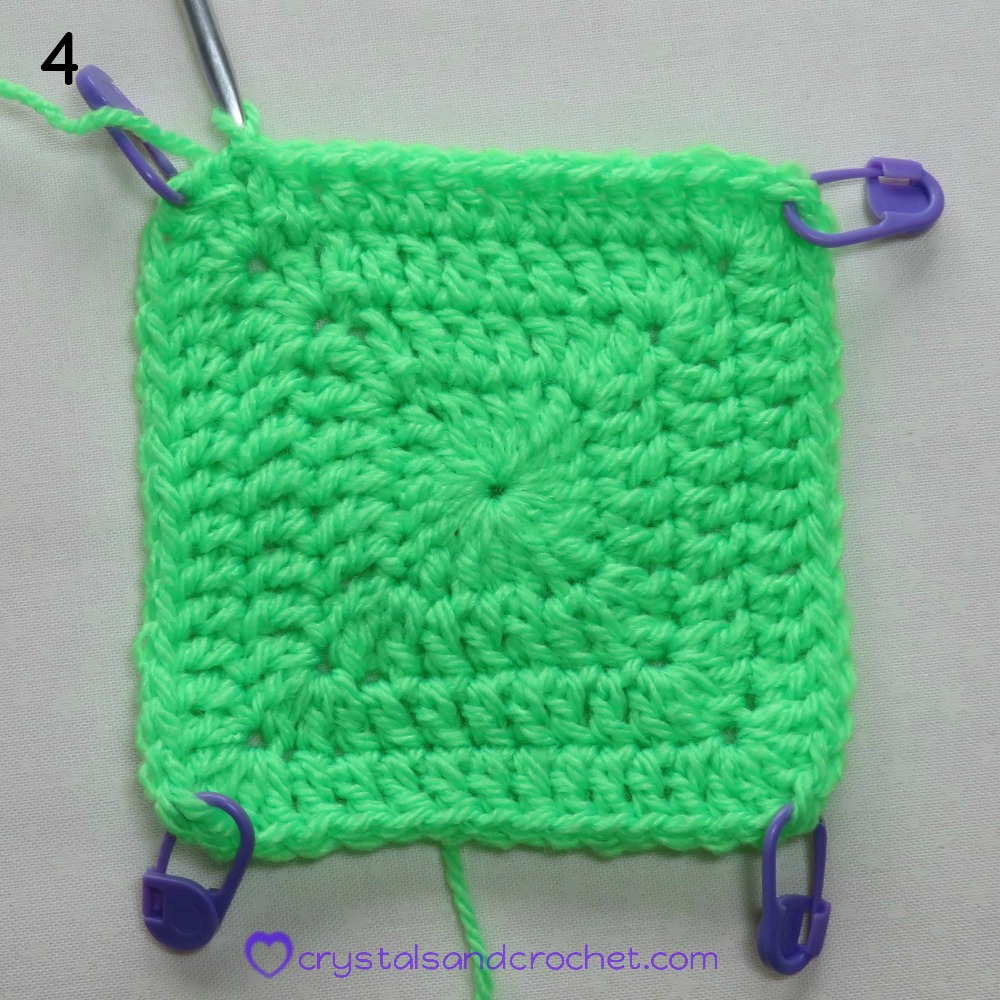
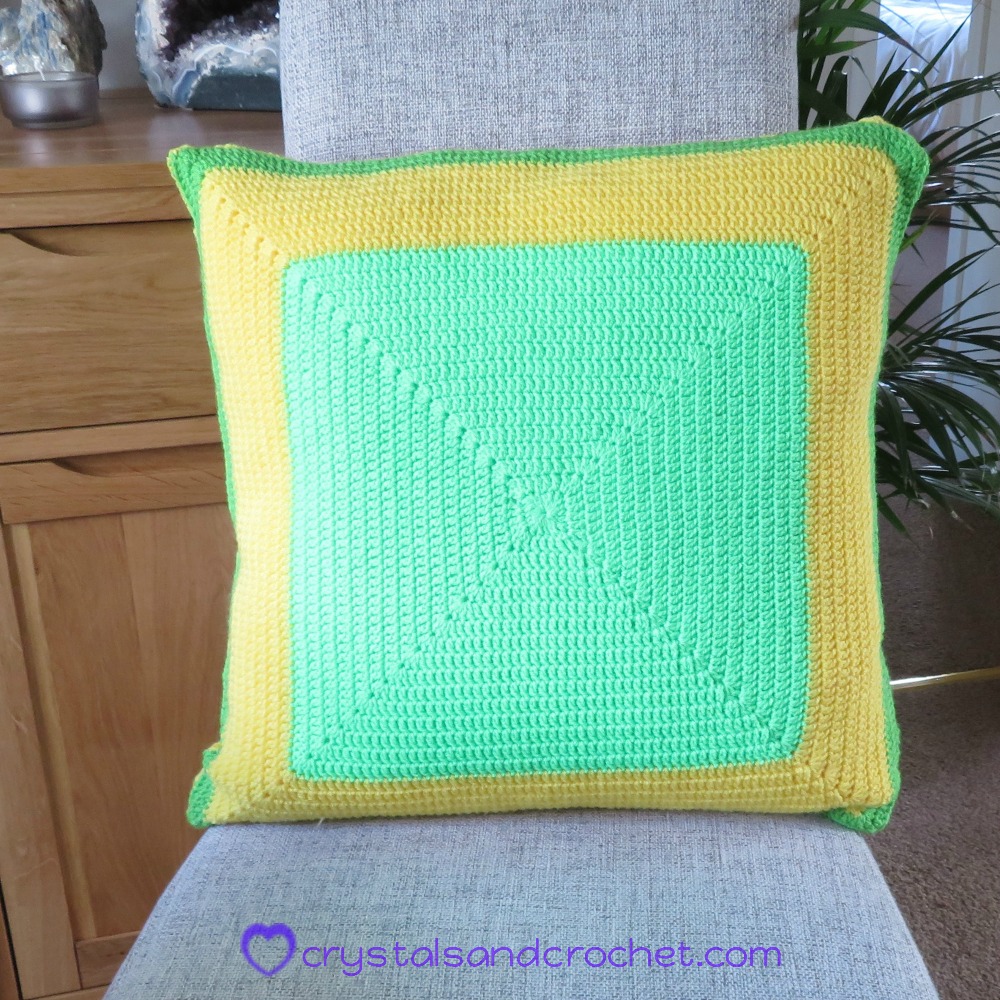
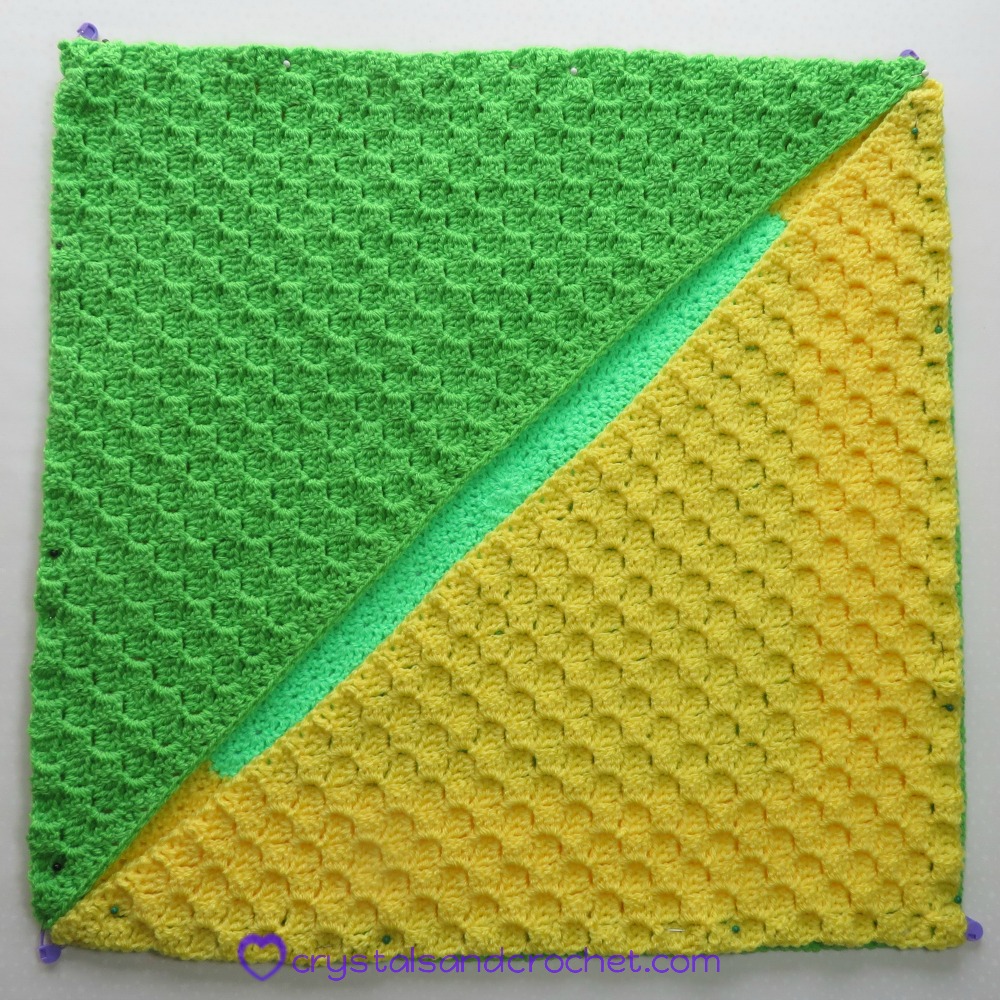
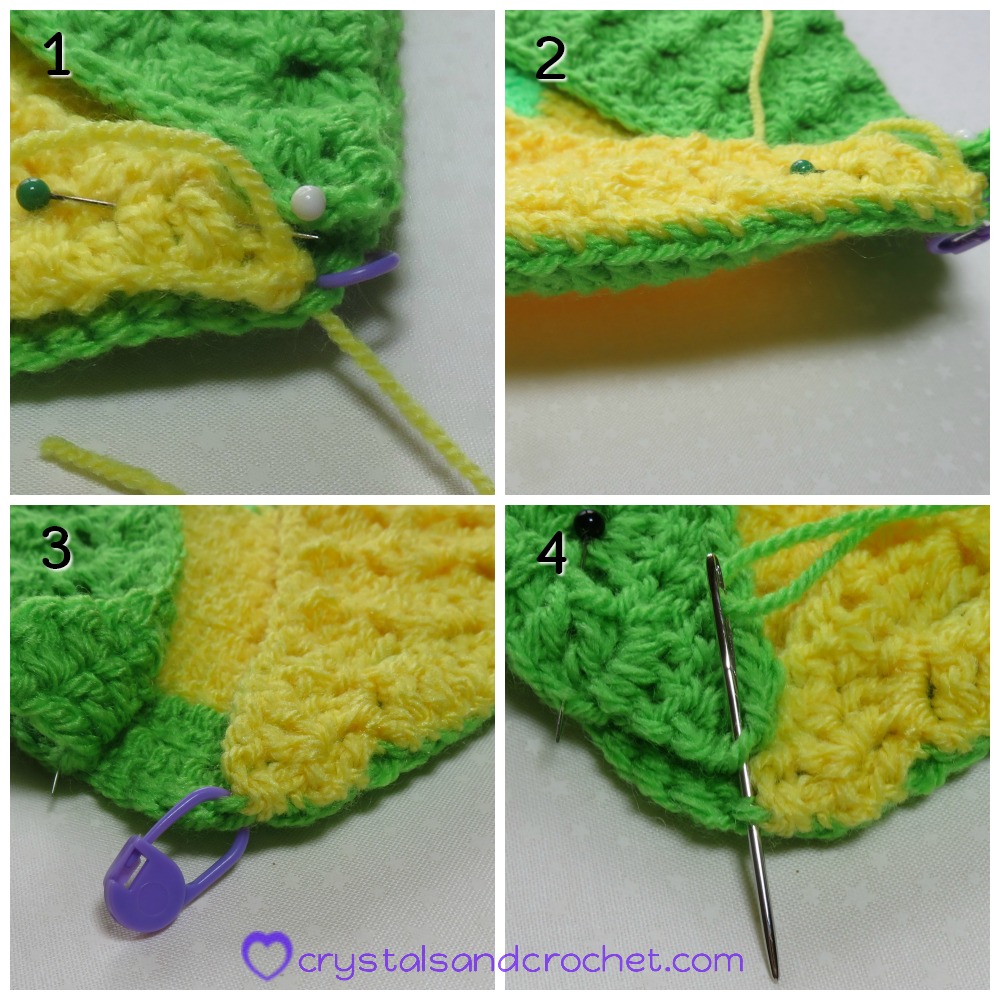
As many of my large squares work perfectly as a cushion facing I thought it was time to look at the back of cushions, as I have often been asked how to crochet the back for a cushion.

Most of the time I cheat and sew mine on to a readymade cover.
I get mine from Ikea as they sell a 100% cotton cover in lots of different colours, they have a zip and are easy to remove wash. The ones I use are called Gurli, they are 20 inches/50 cm square, and cost less than £2, which is cheaper that the yarn it will take to make the back of your cushion!

I prefer to work with cotton yarn for cushions, and my favourite yarn is Stylecraft Classique cotton Dk.
You can purchase the Classique cotton online at Woolwarehouse or Deramores by clicking on the Logo in my preferred partners link at the bottom of this page.
Thank you for supporting me as a designer.

But…. What if you want to crochet a back?

Guess what…… I have come up with some ideas for you.

Both of the examples I have made take approx. 413 meters/451 yards of Dk yarn with a 4mm hook.

You can make a very simple large square with no holes at the corners of the square.

Here is how…

Solid Square.

US terms.

1. Starting with a magic ring, ch 3 [counts as dc], (tr, 4 dc) into ring 3 times, tr, 3 dc.

Join to top of ch-3 with a sl-st.

Stitch count: per side: 4 dc, 1 corner tr.
Hint: you may find it helpful to use stitch markers for the corner stitches.

2. Sl-st into corner st, ch 3 [counts as dc], 2 dc in same st,
dc in each st across, 3 dc in corner tr. [place marker in 2nd dc of each corner].

Join to top of ch-3 with a sl-st.

Stitch count: per side: 6 dc, 1 corner dc.

3. Sl-st in next st and into corner dc, ch 3 [counts as dc], 4 dc in same st,
dc in each st across, 5 dc in corner tr. [place marker in 3rd dc of each corner].

Join to top of ch-3 with a sl-st.

Stitch count: per side: 10 dc, 1 corner dc.

4. Sl-st in next st and into corner dc, ch 3 [counts as dc], 4 dc in same st,
dc in each st across, 5 dc in corner tr. [place marker in 3rd dc of each corner].

Join to top of ch-3 with a sl-st.

Stitch count: per side: 14 dc, 1 corner dc.

Hint: slip stitch into the corner stitch before beginning each round, this will give you a seamless square.

For a plain, seamless, 10 inch square you will need to work a total of 12 rounds, giving a final stitch count of 40 dc per side plus 1 corner dc.

The numbers marked on the square show the number of stitches in each corner.

Repeat Rounds 2 to 4 until you have 22 rounds, then repeat rounds 2, 3 and 2.

This will give you a stitch count per side of 82 dc plus 1 corner dc.

The numbers marked on the square show the number of stitches in each corner.

Making a back like this means you can join it in anyway you like, either sew it with Whip Stitch or make a single crochet join, but do remember you will need to be able to remove the cover for washing.

You may want to only join 3 sides and work away the ends, then use a separate join for the 4th side which is easy to undo and re-work once washed.

C2C also works well. C2C means corner to corner.

To make a c2c back I suggest making 2 triangles, join them to the front but leave the diagonal as an opening to aid removing for washing.

US terms.

Here is how…

1. Chain 6.
1a. Skip 3 ch, dc in next 3 ch.

2. Ch 6.

2a. Skip 3 ch, dc in next 3 ch.

2b. Sl-St in ch-3 space of 1st square.

2c. Ch 3, 3 dc in ch-3 space of 1st square.

3. Ch 6, skip 3 ch, dc in next 3 ch.
*Join to ch-3 of next square with a sl-st, ch 3, 3 dc in ch-3 space. *
Repeat from*to*to end.

4. Continue as before.

Continue working until you have made 30 rows, this will give you a side measurement of 20 inches to match the size of the cushion facing.

You will now need to make a straight edge to your triangle.

E1-3. Ch 3, *dc in next st, hdc in next st, sc in next st, skip ch-3. *
Repeat from * to * across, sc in last ch-3 space.
Work away ends.

Lay your front with wrong side facing you, and with your 2 c2c halves on top.

Pin together to secure while sewing together.

I recommend using the Whip Stitch join when working with c2c pieces.

1. Make sure you start in the corner stitch or corner chain space.
2. Work through back loops only.
3. Work all the way across and into corner.
4. Join 2nd half in the same way.

Don’t worry if there is a gap across the centre, this will pull together as you join.

You can use ribbon and thread it through to secure the centre back, this is also very easy to undo for washing, or add buttons as I have.

Buttons should be sewn on to one side and will easily slip between the ch-3 and dc of the edge to fasten.

cushion backs pdf download US terms only

 All of my tutorials are free and are written or recorded using US terminology.

  If you need help and advice, the quickest way to find support is to join Helen’s Hookaholics Facebook group. There you will find a very supportive group of likeminded people. It’s also a great place to share your crystalsandcrochet makes, and see what others are making, and see what I am up to.

 If you are not a fan of Facebook you can always email me with any questions you may have by using the contact form here.

Adsense

Partners

My Recommended Suppliers